How to record yourself presenting a Google Slide Deck
When producing a slide deck, such as a proposal, a training session or a company plan, you can add yourself to the deck as a video to narrate and guide viewers through the content. This is very handy if you're not presenting live and instead sharing the Google Slide deck with colleagues so they can watch it at their own pace.
Previously, you might have splashed out on a tool like Loom to record yourself and insert the video into your Slide Deck. You no longer need to do this, as Google Slides lets you record yourself directly into your presentation. The recording is then saved into your Google Drive for you to share with those needing to view your slide deck.
Why you should do this?
Recording yourself presenting a Google Slide Deck can add clarity to your presentation.
You can record directly on Google Slides without using tools like Loom.
The recording is saved to your Google Drive and is easy to share.
Watch the video tutorial.
The steps to follow.
Google has made it very easy to add a recording of yourself to a slide deck.
First, you need to create a slide deck or open an existing one to which you have editor access in Google Drive.
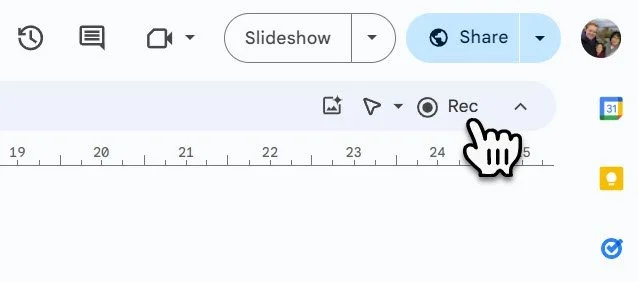
Once the file is open and ready to record, click the "Rec" button at the top right of Google Slides, just below the "Share" button.
If this is your first time recording a video, pop-ups may appear asking for permission to access your microphone and camera in Google Chrome or whatever browser you use.
Next, a new tab will open with your slide deck and the controls to record your video, as outlined in the video above.
These controls let you move the camera view around and adjust the size of the camera capturing you. You can also select a different microphone or camera if you have more than one.
Once you have everything set how you want it, click the red record button to start recording, and click the same button to stop the recording when you have finished.
Once you have completed the recording, the "Re-record" or "Save To Drive" options will appear at the top right.
If you click "Save To Drive," the recording will be saved to your Google Drive in the same folder as the presentation.
If you click "Re-record," your current recording will be wiped, and you can start over. You may want to save the recording to drive first before re-recording and then stitch the two recordings together in video editing software later.